This guide will show you how to edit or add DNS records with Platform i. After registering a new domain or adding an existing domain, you will have the ability to add or edit their DNS records. Keep in mind that modifications are typically only needed in specific situations, such as when your email is hosted on a 3rd party service.
Be sure to point your domain to the following nameservers so your DNS can be managed here: ns1.inmotionhosting.com and ns2.inmotionhosting.com.
Updating Name Servers
- Login to Platform i.
- Click the Domains link in the main menu.
- In the Domain Registrations section, click the Manage link next to your domain.
- If your Domain Lock is set to “On” click the disable link.

- Click the Edit link in the Name Servers section.
- Enter your name servers in the available fields.
- You can also click the Add button to enter more name servers or the Default button to reset them.
- Click the Save button.
- Click the enable link next to the Domain Lock setting.
Managing DNS
- Login to Platform i.
- Click the Domains link in the main menu.
- In the DNS Management section, click the Edit DNS link next to the domain you want to edit.

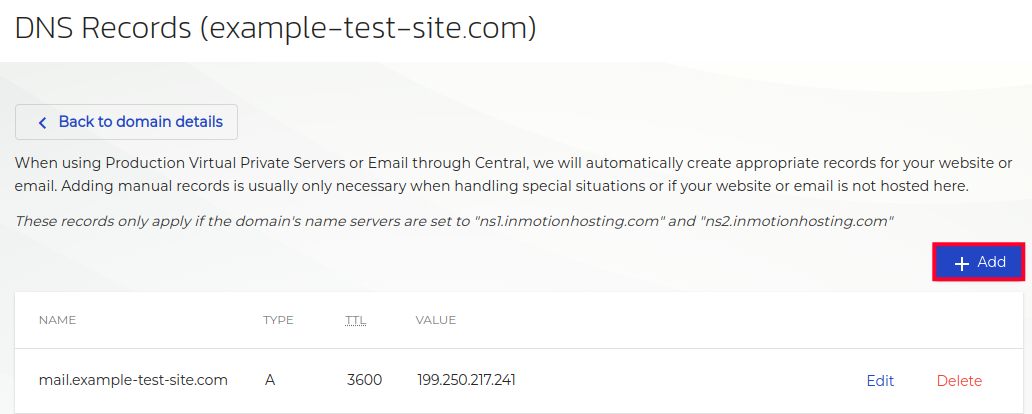
You will then see the following warning:
“When using Production Virtual Private Servers or Email through Platform i, we will automatically create appropriate records for your website or email. Adding manual records is usually only necessary when handling special situations or if your website or email is not hosted here.“
You will then be able to edit an existing record or add a new one, we will go over both options below.
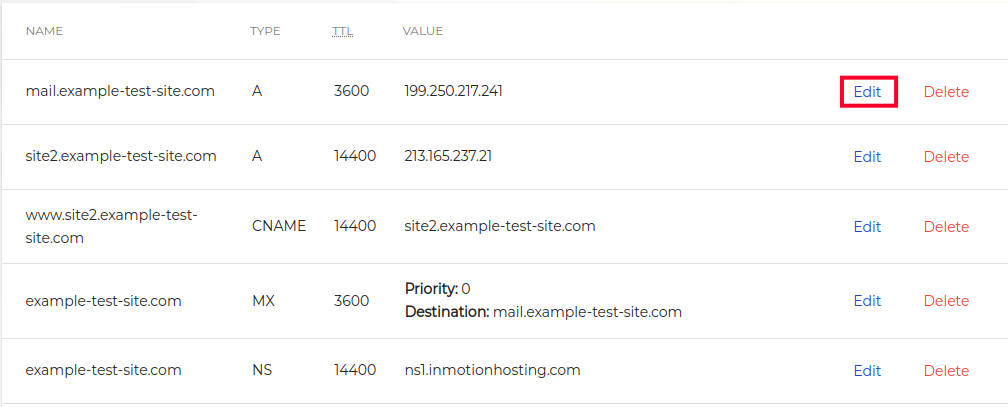
Edit a DNS Record
- Click the Edit link next to the one you want to modify.

- You can then change the DNS record as needed.
- Click the Save link when you are finished. You will then see your updated setting listed.
Add a DNS Record
- Click the blue +Add button.

- You can then enter your DNS settings as needed, keep in mind that the steps will differ based on the type of record you are adding. You can create the following DNS Records:
A, AAAA, CAA, CNAME, MX, NS, SRV, TXT
For this example, we are adding an A record so we are entering information for the available fields:
Name – example.com
Type – A
TTL – 900
Value – 123.456.789.10Note: This is just example information and you should use that values that are needed for your specific setup. - Click the Save button after adding your DNS record settings. The page will refresh and you will see it listed with your other records.
View Server’s IP Address
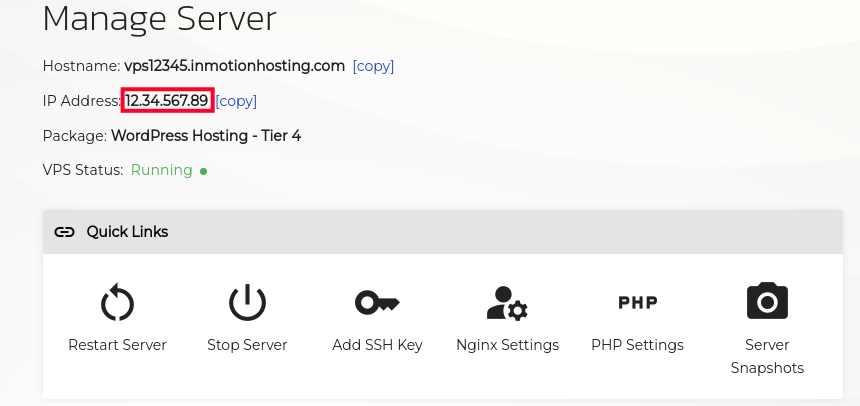
When managing your DNS, there may be times when you need to view the IP address of your server. For example, you may want to update the A Record for your domain to point to a new production server. Here are the steps for viewing your server’s IP address with Platform i. We also recommend bookmarking our full guide on Managing Your Production Server.
- Login to Platform i.
- Click on the Project you’d like to manage.
- Click the Manage Server link in the navigation menu.
- You will then see your server information listed along with your IP Address. You can click the copy button to copy it to your clipboard.

Congratulations, now you know how to manage DNS records with Platform i. Keep in mind that DNS changes can take time to update globally or propagate. For more information see our guide on Propagation Time Monitoring and Estimates.